


You’re thinking of buying a LeBlond heavy-duty lathe.
How do you set it up? What are all the controls? How do you maintain it?
LeBlond Service Manager Christopher Smith has something better than an old Yellow pages-sized manual.
A VIDEO GUIDE where you can practically touch and see the machine in operation!
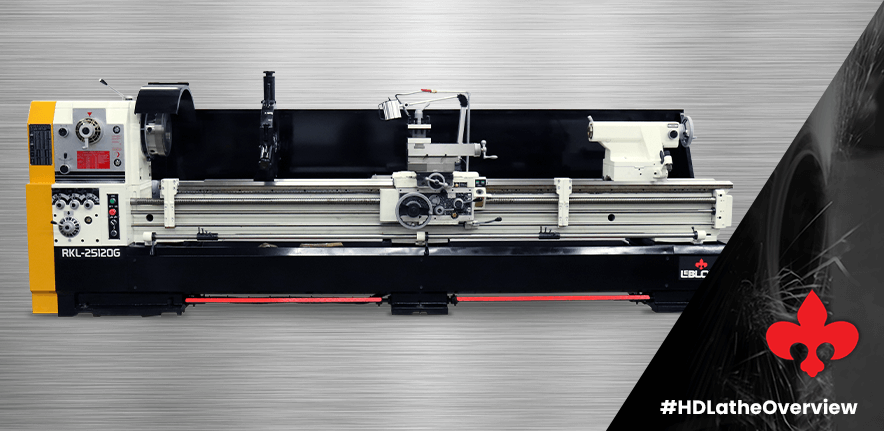
Smith pulls back the curtain on one of our heavy-duty machines (RKL-25120 gearhead), revealing secrets that could transform your metalworking game.
This beast isn’t just another piece of shop equipment – it’s a precision instrument that demands proper handling.
Setup: Find Your Level
First things first: leveling. Skip this step and nothing else matters.
- Leveling pads go under all feet with locking nuts positioned at the top
- Place precision levels across bedways using risers
- Work front-to-back first, then up-and-down
- Run the lathe at around 600 RPM during final adjustments to detect vibrations
Now, on to the machine controls and operation.
LeBlond Heavy-Duty Lathe Headstock Secrets Revealed
The headstock holds more power than most operators ever tap into.
High/low levers, spindle speed changes, feed controls – Smith demonstrates them all.
But here’s where it gets interesting: some adjustments require the machine to be OFF, while others demand it be running. Mix these up and you could be looking at costly repairs.
Ever heard of the clutch adjustment hidden behind a simple thumb screw? Most haven’t.
Smith reveals the oil system secrets that can double your machine’s lifespan. The mysterious “B, C, and BC” settings finally explained. What’s the right setting? You’ll need to watch to find out.
LeBlond heavy-duty lathe safety features are impressive – but only if you know where to find them.
- Chuck guard safety switch
- Emergency stop
- Brake with safety switch
- Overload protection with shear pin technology
Speaking of that shear pin – it’s a $7 part that could save you thousands. Smith shows where the spares are hidden and why you should order extras immediately.
What about those numbered positions along the bed? They’re not what you think.
Tailstock & What Comes Standard
The video closes with an insider look at the tailstock’s double-speed capability and the standard accessories that ship with every heavy-duty lathe.
But Smith leaves one critical maintenance tip for the very end – miss it and your precision work might never reach its potential.
Watch the video to learn this clutch piece of info!
Don’t Miss Our Spring Machine Sale
If you are considering a big lathe, Smith’s video will give you a complete overview of LeBlond’s heavy-duty capability.
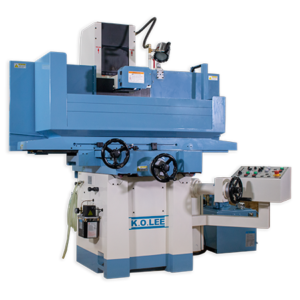
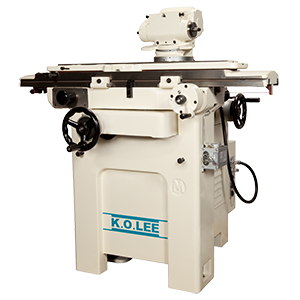
Something not mentioned in the video is that we currently have a Spring 2025 machine sale where you can SAVE UP TO 10% (as much as $7k off) on our LeBlond lathes, mills and K.O. Lee grinders.
To take advantage of our sale or get your heavy-duty lathe questions answered, please contact us:
- Visit THIS PAGE and submit a web lead.
- Call +1 (888) 532-5663 (Monday – Friday 8am-5pm ET) and select Option 2.
- Or leave a comment below!
We look forward to hearing from you!
Video Transcript
Hey you guys, Christopher Smith here with LeBlond. We’re going to talk to you today about our heavy-duty lathes, the functions, leveling it, and all that good stuff. So right now what you see behind me is a RKL-25120 Gearhead Lathe. Let’s go over some of the functions and what you’re going to do when you first get the lathe. When it shows up in your shop, you’re going to set it on the floor and you’re going to want to put these leveling pads down on all the feet and you can see where you’ve got your leveling screws. You want to screw the locking nut all the way up to the top, that way you can get full motion out of it, out of your leveling screw if need be. You’ll want to get you some pretty big adjustable wrenches to work these because the machine is heavy.
To get started, you’re going to want to place your precision levels across the bedways with some precision risers, and you’re going to want to work your front to back first. Once you get your front to back where it needs to be, then you can work on your up and down. Another thing that I have recently learned too, when you get pretty close to getting it dialed in, you want to turn the lathe on to around 600 RPM. Now, this lathe will do 530. So you want to turn it on, just turn the lathe on and let it run and finish your dialing in. That’ll help you find any kind of vibration in the leveling feet and just help you get there that much better.
Let’s start with the headstock. Once you’re leveled, you got your high and low lever up here. There for low to high. Now, sometimes if you struggle to get this in gear, you’ve got a jog button. You can just give it a bow and it’ll lock you right in. That’s your high and low. Then you’ve got your speed for your spindle speed change. You’re just going to change it by turning it around. And again, the same thing with this. If it’s in a bind in a spot where you can’t get it in, just bump the jog button. Then for your feeds, the speed, you got your high and low control here and your forward and reverse, depending on what you’re cutting. Now, all this needs to be done and changed with the machine turned off.
Now, everything below that on here on the gearbox, you want to turn the machine on and let it run and put all this into the configuration that you’ve picked over here on your chart. So yes, over here you have your chart on your feed speeds and ranges and your threading. So once you got that going, you’ve got a safety switch up here on the chuck guard as well that will now allow the machine to run if it’s not down. So we’ll turn the machine on, and you go through all your speed ranges with the machine off. See the rod’s turning? The other speed selected [inaudible 00:03:21] up here, your jog button, on and off for emergency stop. Coolant on and off, and just an indicator light letting you know power is on.
Here’s your apron. You got your on and off lever, up or forward, down, reverse. Your half nut lever, your feed lever, or X and Z. Let’s get it going so we have it full of something with that. You got this knob under here so you can see the Z’s working. Disengage that, push that all the way in, and now your X is midy. Now with that engaged, your half nut will not engage. You have to bring this knob to a neutral position in order to get your half nut there.
Now, another thing you’d be looking for here, you got this thumb screw here. This is for your clutch adjustment for your feeds. You would take this out in a number five Allen wrench, you would adjust this set screw turning it in. You just want to go a half turn to a turn at a time just to get it set up to… That’ll save the life of your tool for you. Down here below you’ve got your oil control for the pump. That’s going to pump every time you’re a Z in. Handle makes a revolution, it’s been a pump for you, so you can turn that on or off depending on how much oil flow you want.
But a great thing to look at over here is your oil control. You’ll see B, C, and BC. We recommend you keep it on BC so that does the bed in the cross slide for you all at the same stroke. Then daily another thing to keep an eye on is your oil level. You want to check that daily and make sure you have plenty of oil in your apron. Now, you can see this knob down underneath here as well. That’s for these to set spots, so when you’re feeding, we’ll see that come down and what’ll happen if you’ve got the stopper set up right, this’ll go across that, if I’m strong enough, and take out your feed for you. That’s everything on the apron for you.
Now, another thing to keep in mind is try to find your oil sites daily. You want to make sure that you have plenty of oil in there so everything stays lubricated and helps with the wear. Same goes for your headstock. You want to check your oil level down here is always at half and then while it’s running, you want to see it flowing up here at the top. If you don’t see flow, then your oil level is too low. Same with your gearbox. Now, I’ll show you in a second, we’re going to take the end cover off. You’ve also got the brake as well. That will stop the machine. You can just light shake tap it and the machine will go off because it is equipped with the safety switch as well, or you can press and hit it and stop the spindle.
Back up here you’ve got your work light and your coolant and you can adjust the flow through the valve up here. Like I was saying so per the end cover, something to look at, I’m already taking a couple of the bolts loose. Now, what we want to look at here, so on the front you’ll see this bolt on the very front and that’s your drain plug for your gear box, for flushing out the oil, for changing the oil. And to add oil is back up here. You got to take the end cover off of that.
Now, you see here your timing belt or your gear box belt, this is equipped with a safety as well. If it gets too overloaded, you’re taking too heavy a cut, or you crash it while feeding, there’s a shear pin on this pulley here. This pulley, it’s actually these two pieces right here. There’s a shear pin. It looks just like this that’s going in between there and it’s a soft key that is designed to break to save your gearbox from blowing out. If you’re ever running and it quits feeding, first thing you want to do is take that cover off and see if this is spinning or not and if it’s not, then it’s your key. You get two of these with the lathe from the get-go. They rent about seven bucks, so it’s always a good idea to grab a couple extra just to have on hand. You got your main drive belts and that safety switch I was talking about for the brake down here as well.
Up here you see this little petcock in a way. It’s for draining the oil out of the headstock to flush the oil out. And then up on the top of the headstock you have a large set screw that will open up for filling the oil back up. Another nice feature with this lathe is this rod you see here on the front. With that, you’ve got these different positions that you can set and are labeled one, two, three, four, and five. What those are for, you can set along the bed for your cutting and when you engage your feed, see this little bearing that popped down? When I engage that, that’s actually going to run along and wind up hitting that stop and kicking your feet out for you. So you can set positions on it when you want it to stop. It’s not a bad idea just to set it before you get too close to the chuck just to have as backup insurance. Something to think about.
Got the tailstock, comes with machine. It’s up like this for shipping purposes. Put that down there, move it forward and back. It’s equipped with a two-speed, so you got your slow or you got your high. It’s a five morse taper quill on the heavy duty. Then also with this machine standard is your standard steady rest and follow rest, spindle bore sleeve with a couple dead centers to work off of, and the faceplate. Guys, that’s it for the heavy duty. If you have any questions on that, please let us know at LeBlondUSA.com and we’ll get you all taken care of. Thanks for taking your time and watching these videos and we’ll see you next time.