9 Causes of Lathe Tooling Wear and How to Minimize Each
Wear on lathe tooling is inevitable. Low frequency wear won’t typically cause catastrophic damage. But over time, problems can surmount. Some of the biggest causes of lathe tool wear and failure are due to a wide range of repetitive, small actions. Knowing the causes of wear and how to correct damaging performance will save you money, reduce waste and prevent unplanned downtime.
Most common causes of tooling wear can manifest in nine ways: flank wear, crater wear, built-up edge, edge chipping, fracture, notch wear, friction on the rake face, plastic deformation and thermal cracking.
Below are ways to identify and minimize different wear types:
Flank Wear
This is gradual wear on the tooling flank face. The cutting edge is damaged due to friction between the cutting tool and the machined metal. Wear increases as cutting speed increases. This results in poor surface finish, inaccuracy and increasing friction. Feel for deterioration on the insert’s cutting edge. Corrective actions include:
- Switching to a harder insert
- Reducing the cutting speed
- Increasing feed rate
- Selecting a more wear-resistant grade
Crater Wear
Gradual concave wear on the rake face due continuous chips passing the rake face at high speeds and feed rates. Identify this when there is a hollow in the rake face slightly behind the cutting edge. Crater wear:
- Changes in the geometry of the edge deteriorating chip formation
- Alters the cutting force direction
- Weakens the edge
Minimize this wear by using a tougher cutting tool material, using a stronger cutting edge, reducing the cutting speed, reducing feed rates or depth of cut or increasing the corner radius.
Built-up Edge
Occurs when cutting material builds up and adhere to the surface of the machining insert. Adhesion happens at low machining temperatures on a tool’s chip face. To prevent this adhesion, raise the surface footage to increase machining temperature. Additionally, you can increase the coolant percentage to add lubrication.
Edge Chipping
Cause of this wear arises from intermittent low-speed cutting cycles of loading and unloading. Also, cutting with overhangs results in vibrations and heavy shock. To fix this wear type, select a tougher grade or an insert with a stronger cutting edge.
Fracture
This is the catastrophic failure of a cutting edge. Fracture usually occurs on the start of a cut if the tool edge hits a shoulder so the full speed abruptly stops on the tool. This happens if the tool is deformed or if there is mechanical fatigue.
Notch Wear
When surface hardness is harder than the base material. Prevent notching by increasing edge prep and varying cutting depths
Friction on the Rake Face
This is caused by improper rake angles used for different machined materials. Increased rake angles can improve cutting action, but weaken the tool. In general, the harder the work-material strength, the smaller the rake angle should be. Review charts with the optimal rake angles for different material types.
Plastic Deformation
Results from a high temperature and high cutting forces. The cutting edge softens due to the high temperatures. This usually happens when machining hardened materials. Identify this when there is poor chip control, poor surface finish, increased cutting forces and shorter tool life. Fix this by:
- Applying proper cutting fluid
- Using cutting tool material with higher wear resistance
- Using inserts with additional coatings
- Reducing cutting data
Thermal Cracking
Cracks appear perpendicular to the cutting edge due to large, rapid temperature changes. This occurs in interrupted cutting or when machining hardened workpieces with intermittently applied cutting fluid. Using a harder, more wear resistant grade can fix this problem. Also, using higher volumes and pressures of coolant helps.
Lathe machine tooling.
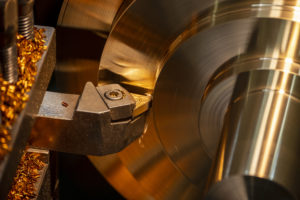
Lathe machine finishing process cuts brass shaft material. The metalworking process by turning machine.

