


Ever been stuck with a busted lathe because of a worn-out belt?
LeBlond Service Manager Christopher Smith dives into the belt replacement secrets most machinists never learn. Your shop could be losing thousands in downtime, but this problem has a simple fix.
In This Video, You’ll Discover:
- The towel technique that makes belt removal lightning-fast
- A critical finger placement warning that most manuals don’t mention
- Why your new belts might feel too tight (and what to do about it)
- The patience-demanding method for those tricky timing belts
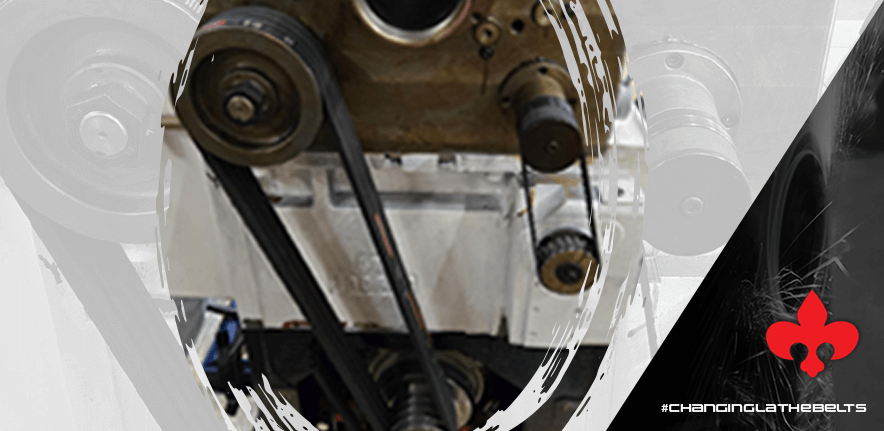
Most technicians make devastating mistakes when handling the main drive belts. They overlook the machine’s neutral position requirement. This one step changes everything. Smith demonstrates a quick-twist method that pulls belts off in seconds without tools, and there’s a specific reason he always starts with the small pulley.
Deflect & Destroy
That one-inch deflection test is your golden measurement — too loose or too tight means trouble. Timing belts demand an entirely different approach, and Smith shows exactly where to begin and how to line up those teeth perfectly. The secret is in the slow, methodical motion.
What about that motor plate adjustment most owners forget exists? It’s the difference between smooth operation and constant frustration.
Want to see these techniques in action and learn the missing details that could save your machine? Watch the full video now.
Interested in LeBlond Lathe Belts?
- Call +1 (888) 532-5663 (Monday – Friday 8am-5pm ET) and select Option 2.
- Or leave a comment below!
We look forward to hearing from you!
Video Transcript
Hey, guys. Christopher Smith here with LeBlond. We’re going to talk today about our belts, how to replace them.
We get this a lot, especially with the timing belt and cog belt. With your main drive belts, what I’ve been taught and do … I’ll get that in a second … is I use a shop towel. You’re going to want to put your lathe into neutral. Wrap your towel around the belt, and then just whip it up and pull it off, just like that. I’ll go ahead.
Make sure to keep your fingers on the outside of the towel so you don’t get them caught in the pulley, especially on the backside when you’ve got one that has the five belts. You’re just going to keep going back and forth and pulling it over until it pops off.
Now, to get them back on, this machine’s equipped with four belts, so I always start with the small pulley first. Stick the bottom on and just get it up there. Work it over, and you want to make sure you get it where the belt is not twisted. Here we go with that one. Keep it going there ’til we’re done.
Now, something you might find is with your new belt, it may be pretty tight, and if that’s the case too, all the LeBlond lathes, the motors are on a plate and you can move in and out, so you can keep good tension on your belts. Your old belts might’ve been stretched out and someone adjusted the plate down, so with your new belts, if they’re tight, you’re going to have to bring your plate back up, and get it to where you have no more than one inch deflection when you push on it like this.
Now, for your cog belt or a timing belt, patience is the key here. I need that Allen wrench I dropped. You’re going to take the end cover off. Slowly work it off. There we go. Now, to get it back on, I start at the top and I keep it out towards the end. Then I come down and make sure that my teeth line up. Once I get it going, then I can slowly work it on, just like so. Replace the cover, and we’re back up and running again.
If you have any questions on that or want to see anything else that we can help you through, please let us know at LeBlondUSA.com. We’re always here and happy to help, and we’ll see you next time.